Upgrading Robot Firmware
ONLY DO THIS WHEN YOU ARE GUIDED BY US
This process is complex and can brick the controller if not done correctly. Only do this when you are guided by us. If you do this yourself and brick the controller, the warranty will be void.
Potential Data Loss
Upgrading the firmware might cause the configuration of the controller to be lost. Don't worry, we will provide latest default configuration file for you to download.
Prerequisites
- A type-C USB cable.
- A computer with Ubuntu 20.04 or later.
Clone xrock repository, and follow its instructions to build the xrock tool.
Enter bootloader mode
Base
- Shutdown the base. Make sure the base is completely off. (Switch is off, and screen turns black)
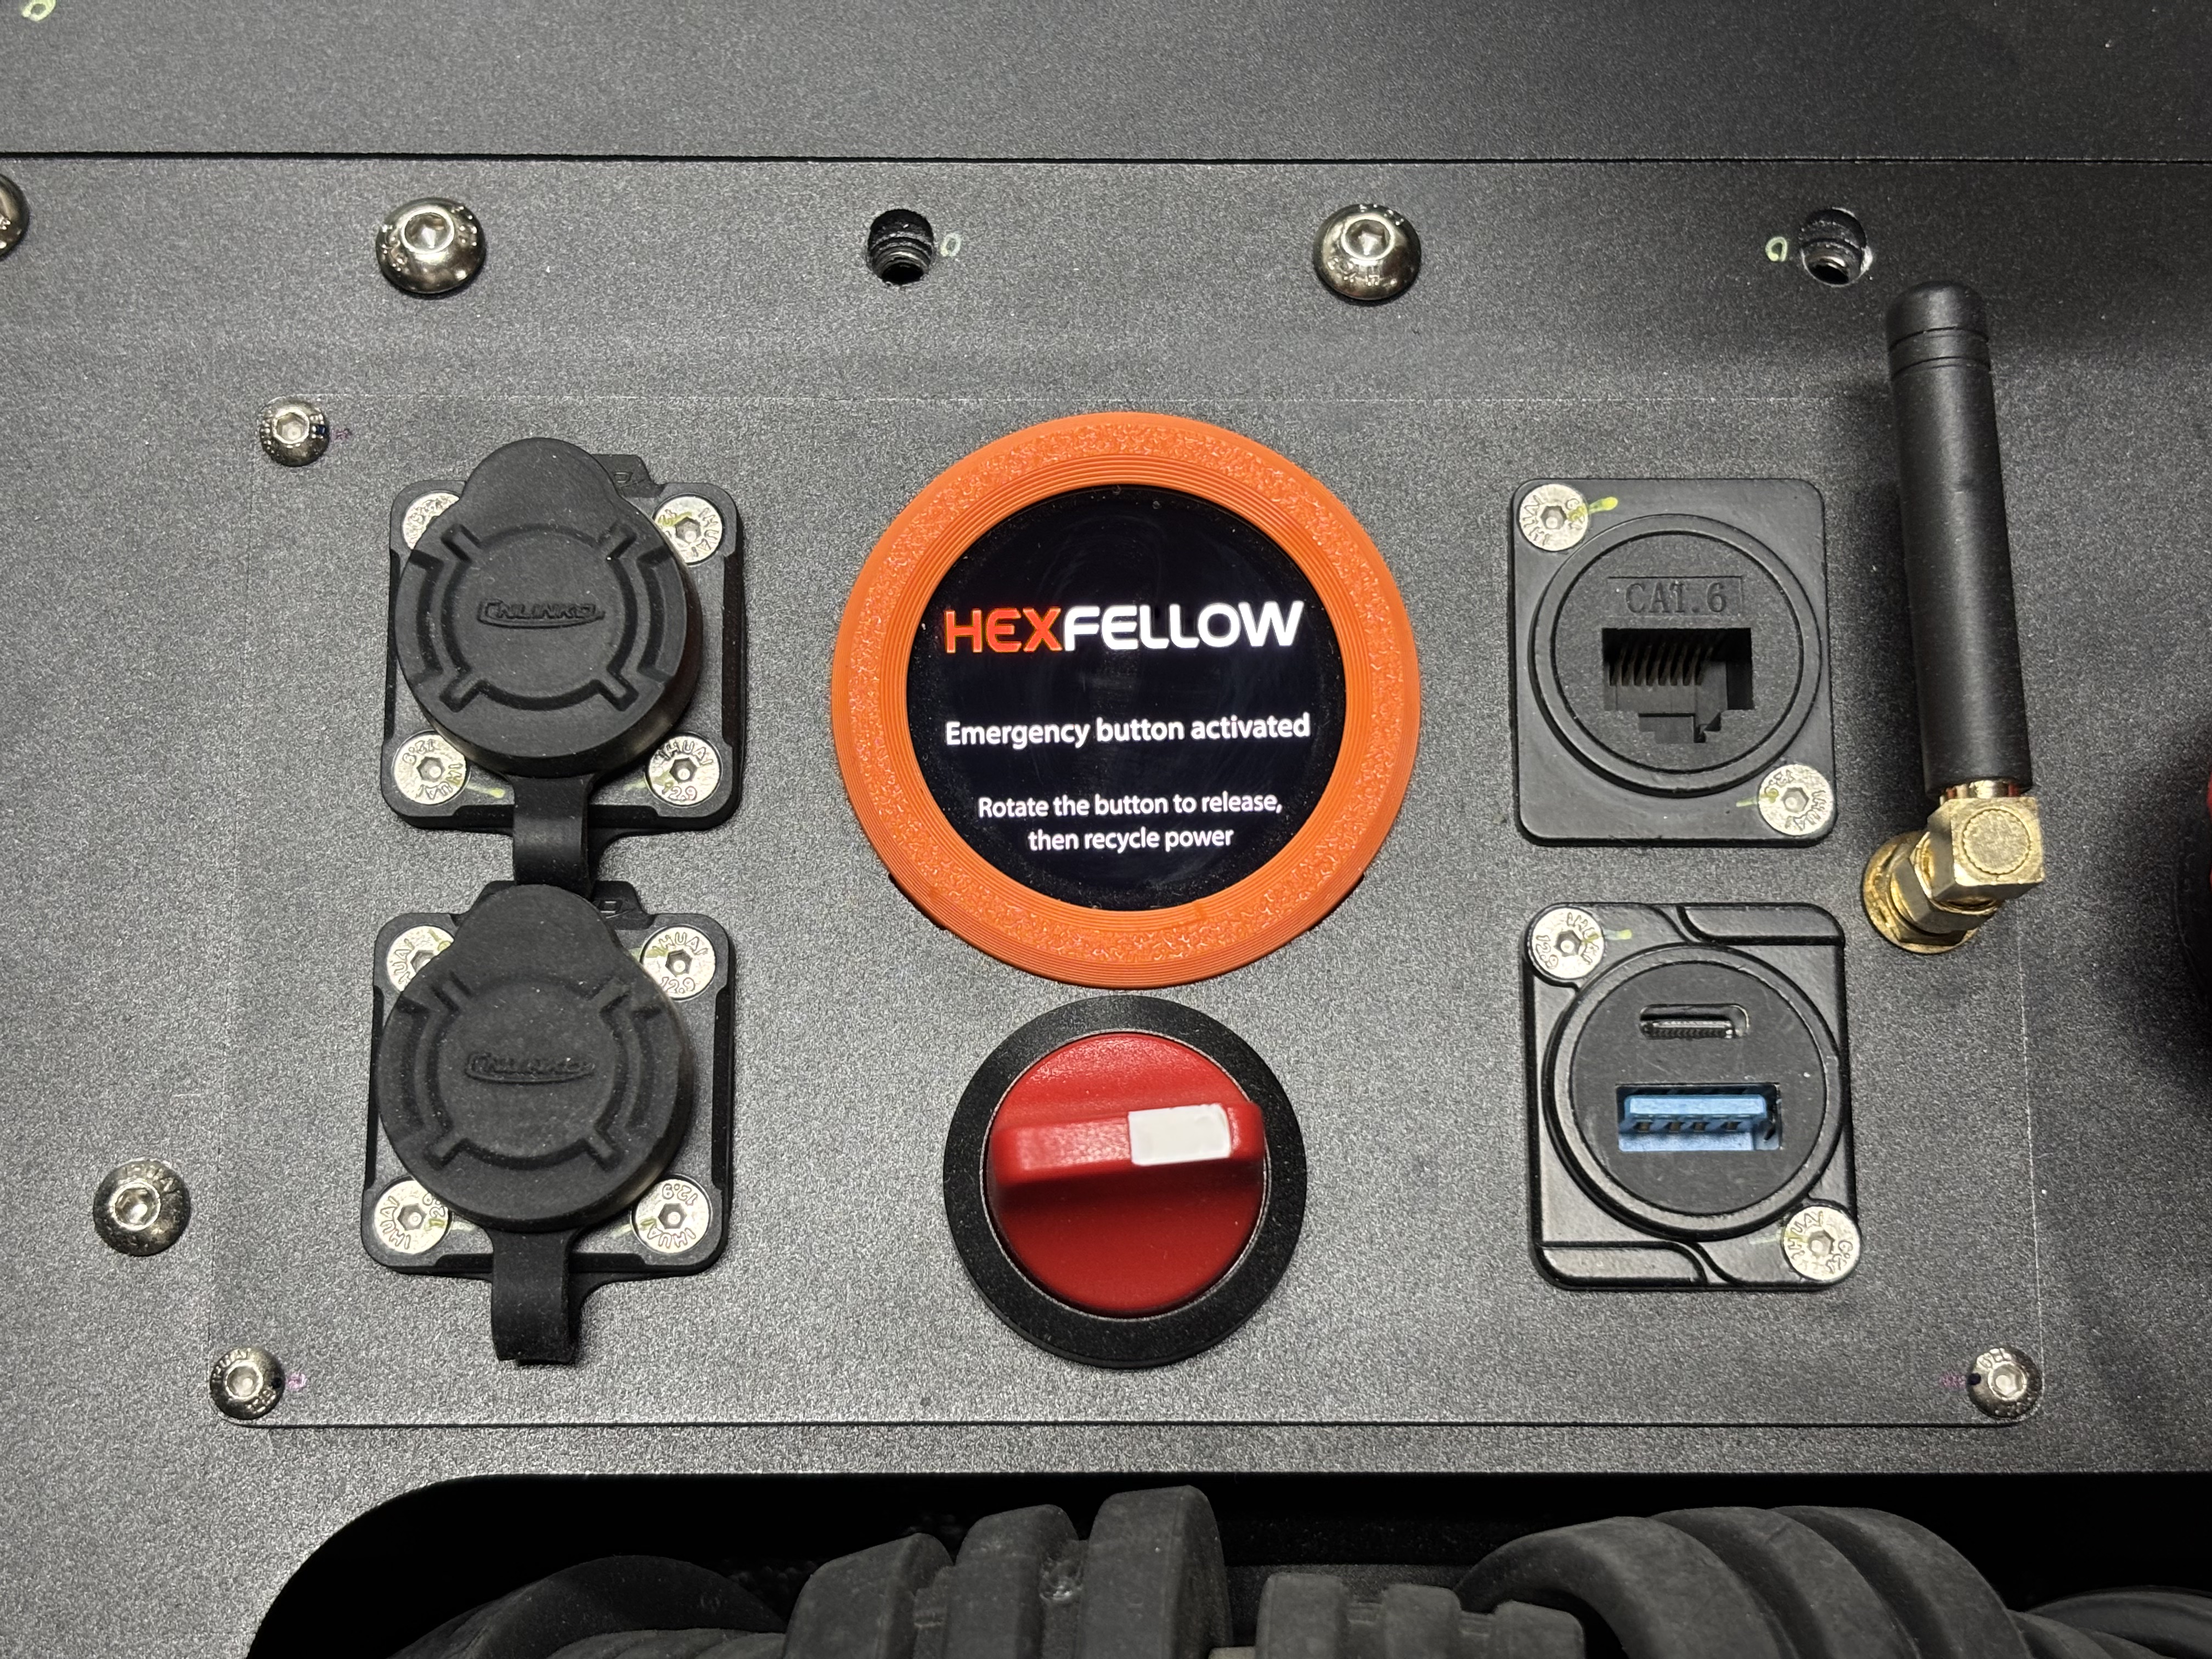
- Push the Emergency Stop button. It will self lock and please keep it that way.
- Turn on the main power switch. (When you do so, the Emergency Stop should still be locked)
You can check if the controller is bootloader mode on the screen of the base. When the controller is in bootloader mode, the screen will display that Emergency Stop is pressed.
Now you are in bootloader mode.
Start flashing
- Download the upgrade file we sent to you, might come in a zip file or a tar.gz file, but after extraction, it should be a file named like
rootfs.ext2. - Connect the USB cable. Plug the type-c port to CONTROLLER's type-c port. If you don't see type-c port on the controller, contact us. Do not plug into controller's USB-A port.
-
Run
sudo ./xrock flash write 262144 {PATH_TO_THE_ROOTFS_EXT2_FILE}in thexrockdirectory. If it says no supported chip found, please check you you connection/cable.MAKE SURE YOU TYPE 262144 CORRECTLY. If you make a typo, you will brick the controller.
-
Wait for the flashing to complete.
- After it completes, go unplug the USB cable, turn off the main power switch, release the Emergency Stop button.
- Turn on the main power switch, the system should boot normally.
- If the robot screen shows Unknown Device, go to https://github.com/hexfellow/controller-config and follow the instructions to download the latest default configuration file and push them to the controller.